How To Carve A Turkey Like A Pro For Your Next Big Meal
The holiday season brings so many wonderful things, and a beautifully cooked turkey often sits at the heart of those special gatherings. Yet, for many, the thought of carving that magnificent bird can feel a bit daunting. It's almost like a performance, really, with everyone watching as you prepare to serve up deliciousness. You want to make sure each slice is just right, and that the presentation looks as good as the meal tastes. This guide will walk you through the simple steps to achieve that perfect carve, making your next big meal a truly memorable one.
Learning how to carve a turkey well is a skill that truly comes in handy, especially when feeding a crowd. It's about more than just cutting meat; it's about showing off all your hard work in the kitchen, and making sure everyone gets a lovely portion. Think of it like shaping something with care, much like how you would create something special by cutting into a material, or making a desired shape. This process, you know, can be quite satisfying once you get the hang of it.
We'll cover everything from getting your tools ready to presenting the finished slices, so you can approach the carving board with confidence. Just like exploring premium collections crafted with unmatched quality, perhaps like those found at Carve, where the best clothing meets exceptional style, you're about to discover how a little precision can make all the difference in your turkey preparation. You'll soon be carving like you've done it a hundred times before, and that's a pretty good feeling.
- Unveiling The Dynamic Duo Discoveries And Insights About Bryan De La Cruzs Brother
- Rising Stars Uncovering The Potential Of Mikey Williams And Jada Williams
- Unveiling Russell Peters Net Worth A Journey To Financial Success
- Peso Pluma New Haircut
- Unveiling Miranda Lambert Discoveries And Insights Await
Table of Contents
- Getting Ready for the Carve
- The Right Tools for the Job
- Resting Your Turkey: The Secret Step
- How to Carve a Turkey: Step-by-Step
- Presenting Your Masterpiece
- Frequently Asked Questions About Turkey Carving
- Final Thoughts on Carving Your Turkey
Getting Ready for the Carve
Before you even think about slicing into that beautiful bird, you need to set up your carving station. This makes the whole process smoother, you know. A clear, steady surface is key, perhaps a large cutting board with a good grip. This keeps the turkey from sliding around, which is pretty important for safety.
Having enough space to work is also a big deal. You'll be moving the turkey around a bit, and you'll need room for the carved pieces too. So, clear away any clutter from your counter, and make sure you have everything within easy reach. It just makes the whole experience less stressful, really.
The Right Tools for the Job
Having the proper tools can make all the difference when you're learning how to carve a turkey. You wouldn't try to make a detailed pattern by cutting away material from wood with a dull tool, would you? The same idea applies here. A sharp knife is, you know, absolutely essential for clean cuts.
- Uncover The Secrets Behind El Pack De Yeferson Cossio
- Unveiling Joran Van Der Sloots Height Exploring Insights And Surprising Revelations
- Chico Lachowski Side Profile
- I Used To Pray For Times Like This
- Unveiling The Secrets Rick Steves Marital Journey And Beyond
Here’s what you'll want to have on hand:
- Carving Knife: This is a long, thin knife, typically eight to fifteen inches in length. It's designed for slicing through large cuts of meat, and it has a nice, pointed tip for getting into tight spots. A sharp edge on this is very important.
- Carving Fork: This fork has two long, sturdy tines. It helps you hold the turkey steady while you cut, keeping your hands safe and giving you better control. It's basically your helping hand, so to speak.
- Sharpening Steel or Stone: Even the best knives need a little touch-up. A quick pass on a steel before you start can make a world of difference in your cuts. It ensures that the meaning of carve, which is to cut with care or precision, truly comes through.
- Large Cutting Board: A board with a well for catching juices is a great idea. This keeps your counter clean and helps you collect those delicious drippings for gravy. It’s a small detail that makes a big impact, you know.
Resting Your Turkey: The Secret Step
This might be the most crucial step in achieving a juicy, easy-to-carve turkey. Once your turkey comes out of the oven, it needs time to rest. Like, a lot of time, actually. We're talking at least 20 to 30 minutes for a smaller bird, and up to an hour for a really big one.
Why rest it? Well, during cooking, the juices in the meat get pushed towards the center. If you cut into it right away, all those lovely juices will just run out onto your cutting board, leaving you with dry meat. Letting it rest allows those juices to redistribute throughout the meat, making every slice tender and flavorful. It's a bit like letting a good idea settle before you act on it, you know.
Just loosely tent the turkey with foil to keep it warm while it rests. This step, you know, is really what separates a good turkey from a truly great one. It’s worth the wait, honestly.
How to Carve a Turkey: Step-by-Step
Alright, it’s time for the main event! You’ve got your tools, your rested turkey, and a clear workspace. Remember, the meaning of carve is to cut with care or precision, and you’re about to do just that. You’ll be cutting into a desired shape, making this bird ready for everyone to enjoy. So, let’s get started.
Removing the Legs and Thighs
Start by placing the turkey on your cutting board, breast-side up. This is usually the easiest way to begin. Find where the leg meets the body, and gently pull the leg away from the body. You’ll see a natural crease or joint there, you know.
Using your carving knife, cut through the skin and meat that connects the leg and thigh to the body. Keep cutting until you hit the joint. You might need to wiggle the leg a little bit to find the exact spot where the joint connects. It's like finding the perfect seam in a piece of fabric, almost.
Once you locate the joint, cut straight through it. It should separate quite easily if you hit the right spot, without much force. Do this for both legs. You’ve just removed the first major sections, which is pretty good.
Separating the Drumsticks and Thighs
Now that you have the whole leg-thigh pieces, it's time to separate them. Place one leg-thigh piece skin-side down on your board. Find the joint where the drumstick and thigh meet. This is typically a very clear connection point, actually.
Cut straight through this joint with your knife. Again, it should go through fairly smoothly if you're hitting the joint correctly. You now have a drumstick and a thigh piece. You can then slice the thigh meat off the bone, or you can serve the thigh whole if you prefer. Some people like to make something by cutting into a solid material to get the meat off the bone, others just serve it as is.
Repeat this for the other leg-thigh piece. You're making good progress, and you're already seeing how you can cut into pieces or slices, as meat, for serving. This is, you know, a very important part of the process.
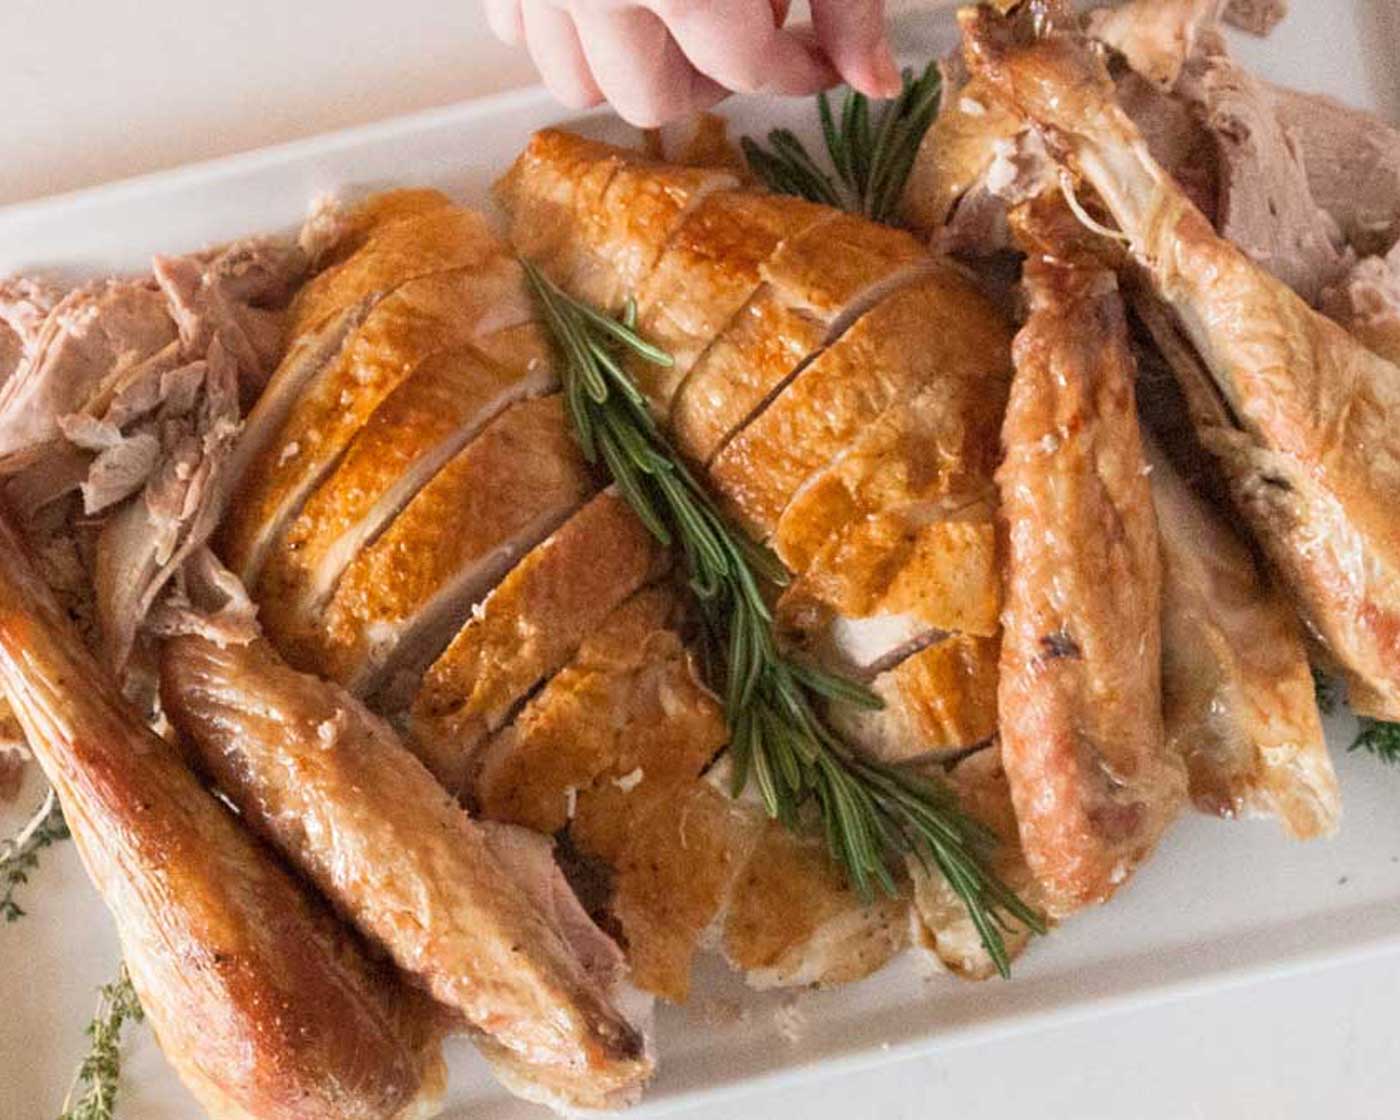
Slicing the Breast Meat
This is often the star of the show, so you want to do it right. First, locate the breastbone down the center of the turkey. Make a long, deep cut parallel to the breastbone, all the way down one side of the turkey. This creates a guide for your slices, you know.
Now, starting from the top of the breast, make horizontal slices down towards that initial cut you made. Angle your knife slightly to follow the natural curve of the breast. Each slice should be even and relatively thin, about a quarter to a half-inch thick. You’re shaping to sculptural effect here, really.
As you slice, the pieces should fall away cleanly. You can arrange them directly onto a serving platter as you go. It's quite satisfying to see those neat slices appear. This is where you truly cut meat in order to serve it, and it feels pretty good.
Repeat this process for the other side of the breast. Remember to keep your knife sharp; it makes the job so much easier, and the slices look so much better. It's like how you might carve a statue out of wood or stone, where precision leads to a beautiful finished product.
Taking Off the Wings
The wings are usually the last parts to come off. Find where the wing connects to the body. There’s a joint there, much like with the legs. You might need to twist the wing a little to expose the joint fully. This helps you get a clean cut, you know.
Cut through the joint to remove the wing. Some people like to separate the wing into two parts at the joint, while others serve them whole. It's really up to personal preference. You're just cutting to form something, in this case, a serving piece. You've almost got the whole bird broken down now, which is pretty impressive.
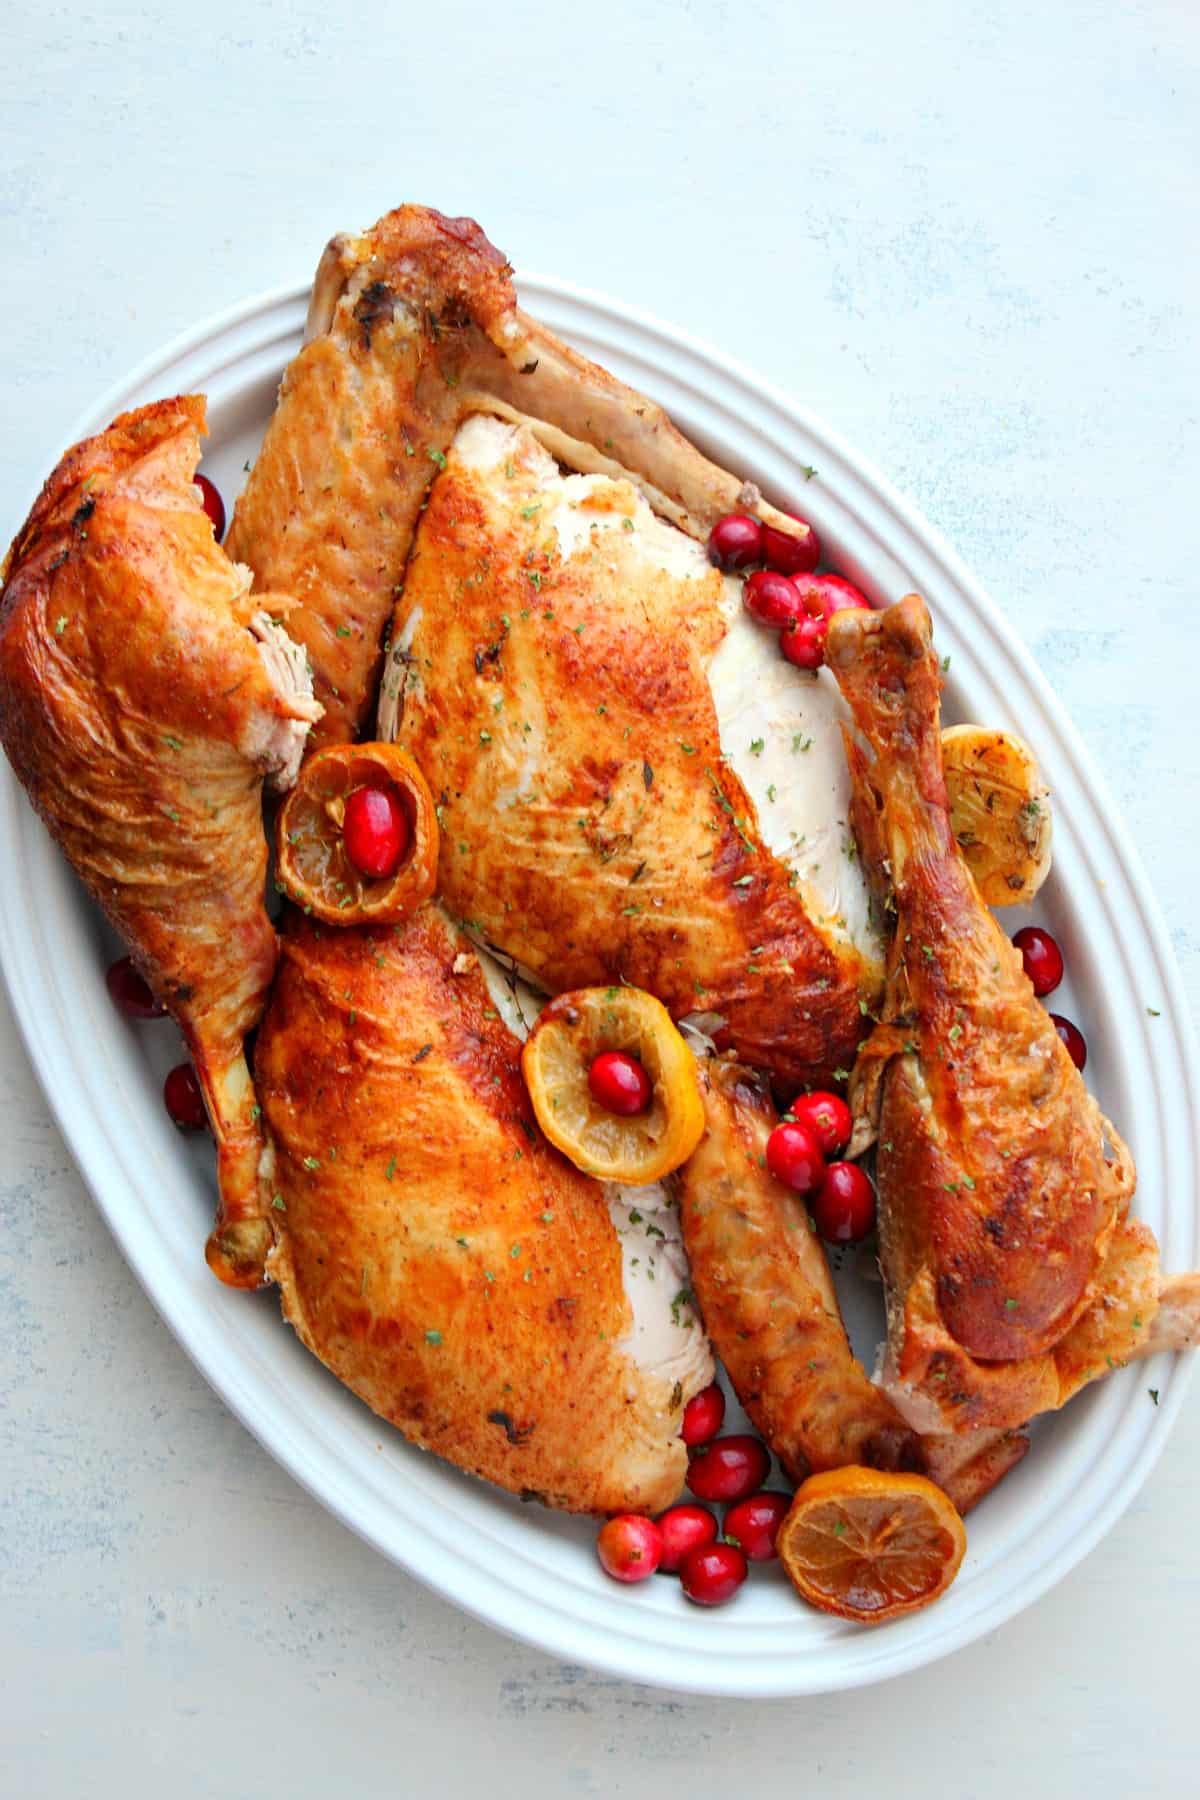
Presenting Your Masterpiece
Once all the meat is carved, arrange it nicely on a warm serving platter. You can mix the dark and white meat, or keep them separate, depending on what your guests prefer. A little garnish, like fresh herbs or cranberries, can really make the platter pop. It's about making it look inviting, you know.
Remember, you've just performed the art of carving, creating something by cutting into a solid material. This effort, honestly, adds so much to the meal experience. You've produced a work by cutting, and it looks great.
For more great cooking tips and ways to make your home entertaining shine, you can learn more about on our site. And for other ideas to make your gatherings truly special, link to this page . It’s all about making your life easier and more stylish, you know, just like how Carve offers effortless style and premium collections.
Frequently Asked Questions About Turkey Carving
What is the easiest way to carve a turkey?
The easiest way to carve a turkey involves a few simple steps, honestly. First, ensure your turkey has rested properly; this makes the meat much easier to slice. Then, use a very sharp carving knife. Start by removing the legs and thighs, then separate the drumsticks from the thighs. After that, slice the breast meat by making a guiding cut along the breastbone, then making horizontal slices. This method, you know, breaks the process down into manageable parts.
Should you carve a turkey hot or cold?
You should always carve a turkey after it has rested, but while it is still warm. Carving a turkey right out of the oven will cause all the juices to run out, leaving you with dry meat, you know. Carving it cold, on the other hand, can make the meat a bit tougher to slice and less enjoyable to eat. So, warm and rested is the ideal state, truly.
Do you need a special knife to carve a turkey?
While you can use a regular sharp chef's knife, a dedicated carving knife truly makes the job much easier and yields better results. A carving knife is long and thin, which allows for smooth, even slices through large cuts of meat, you know. It also helps you get into those tricky areas around the bones. So, while not strictly necessary, it's a very helpful tool to have on hand. For more on kitchen tools, check out this helpful guide on Serious Eats.
Final Thoughts on Carving Your Turkey
Carving a turkey, you know, is really just another part of the cooking process, and with a little practice, it becomes quite simple. Think of it as shaping something with precision, like you might form something from a solid material by cutting. Each cut, each slice, contributes to the final presentation and enjoyment of your meal. You're not just cutting; you're creating a beautiful platter for your loved ones.
So, the next time you have a magnificent turkey ready, approach the carving board with confidence. You have the knowledge and the steps to make it a smooth, successful experience. You'll be able to cut into pieces or slices, as meat, with ease, and everyone will appreciate your efforts. It’s a skill that will serve you well for many holiday seasons to come, and that’s a pretty good thing.
Just as you appreciate the defined curved shape in a pair of Carve jeans that creates a bold, structured look, you can appreciate the structure and beauty of a perfectly carved turkey. It's all about care and precision, really. You've got this.
Remember, you carve the roast, and then you get to enjoy it with all the vegetables and fixings. It’s a wonderful tradition, and now you’re fully equipped to make it shine. Enjoy every delicious bite!
Today is , and you're ready to master this skill. Happy carving!
<- Unveiling The Enigma Discover The Genius Behind Eric Von Haessler
- Unveiling Secrets Why Your Native Body Wash Pump Wont Open
- Dark Hair With Highlights
- Unveiling Norah Jones Rich Tapestry Of Heritage
- Unveiling The Enigma Uncover The Secrets Behind Honey Where Are My Handcuffs

How to Carve a Turkey {Step-by-Step Photos} - Feel Good Foodie
How to Carve a Turkey (step by step) - Crunchy Creamy Sweet
How to Carve a Turkey | Metropolitan Market
