Mastering How To Fold A Fitted Sheet: Your Quick Guide To A Tidy Linen Closet
Do you, like so many others, find yourself wrestling with that fitted sheet after laundry day? It's a common struggle, trying to get those elasticized edges to behave, isn't it? For many, the idea of folding a fitted sheet neatly feels a bit like trying to solve a puzzle with too many pieces, and it often leaves us with a bulky, shapeless lump that takes up too much room in the cupboard. Honestly, it can be a source of real laundry day frustration, you know?
It's funny, really, how something as simple as a bed sheet can cause such a headache. You might have seen others fold them so effortlessly, making it look incredibly simple, yet when you try, it just seems to unravel. This struggle often leads to sheets being shoved into drawers or piled up in a closet, creating a bit of a mess that's not very appealing when you open the door. So, if you've ever felt that particular kind of laundry day despair, you're definitely not alone in that feeling.
But what if I told you there's a straightforward way to conquer this challenge? A method that turns that floppy piece of fabric into a crisp, neat package, ready for your linen space? It's not some kind of magic trick, just a simple technique that, once learned, you'll wonder how you ever lived without it. As a matter of fact, this approach, described in "My text," promises a foolproof way to get those sharp corners and a perfectly flat sheet, which is rather nice for your closet, you see.
- Uncover The Truth Jaiden Animations Sexuality And Pronouns Revealed
- Uncover The Thrilling World Of Cambodian Sports With Khmer Sport News
- Unveil Hidden Truths Embark On A Journey Of Discovery With I Have No Knowledge Of Any Of This
- Unveiling Joran Van Der Sloots Height Exploring Insights And Surprising Revelations
- Unveiling The Brilliance Of Noma Dumezweni A Journey Of Discovery
Table of Contents
- Why Learning How to Fold a Fitted Sheet Matters
- Getting Ready: What You Need
- The Simple Steps to Fold a Fitted Sheet (A Foolproof Method)
- Step 1: Laying it Out Just Right
- Step 2: Bringing the Corners Together
- Step 3: Folding Lengthwise
- Step 4: Nestling the Remaining Corners
- Step 5: The Final Fold for a Neat Package
- Tips for a Super Tidy Result
- Beyond Folding: Storing Your Linens Well
- Common Questions About Folding Fitted Sheets
Why Learning How to Fold a Fitted Sheet Matters
You might be thinking, "Is it really that big of a deal?" Well, actually, yes, it can make a pretty big difference in your home life. Having a system for things, even small ones like folding sheets, contributes to a sense of order and calm, which is nice. This isn't just about being particular; it's about making your living space work better for you, and that's something worth thinking about, isn't it?
Keeping Your Linen Closet Organized
A messy linen cupboard can be a bit of a nightmare, can't it? When sheets are just shoved in, they often look like a jumbled heap, and finding the matching pillowcases becomes a bit of a treasure hunt. Learning how to fold a fitted sheet properly, as "My text" points out, means no more messy sheets in there. You'll have neat and tidy folded packages, which, honestly, just looks so much better and feels more calming when you open the door. It makes a real difference to the whole feel of the space, you know.
Protecting Your Sheets
Believe it or not, how you store your sheets affects how long they last. When sheets are crumpled or stuffed away, the fabric can get creased in odd ways, and over time, this might even weaken the fibers. This clever technique, as "My text" mentions, allows you to store neat and crisp sheets, which actually helps maintain them. Keeping them flat and unwrinkled means they'll feel nicer when you put them on the bed, and they'll probably last longer too, which is a pretty good bonus.
- Unveiling The Strength And Resilience Of Paquita La Del Barrio
- Unveiling Eduardo Saverins Wealth Lifestyle And Impact
- Unveiling The Truth Sonya Millers Journey Survivor Advocate And Master Ps Exwife
- Unveiling The Extraordinary Journey Of Jeffrey Bruce Livingston
- Unveil The Enchanting World Of Zach Galifianakis Beloved
Saving Space
Fitted sheets, with all their elastic and odd shapes, can be real space hogs when they're not folded well. They tend to puff up and take up way more room than they need to, making your shelves feel crowded. When you fold them into a flat, compact shape, you free up a lot of valuable space in your linen closet. This means you can fit more things in there, or simply enjoy a less cluttered look, which is always a plus, isn't it? It's pretty much a win-win situation.
Getting Ready: What You Need
Before you start, gather your tools. Don't worry, you won't need anything fancy or hard to find. As "My text" mentions, all you'll need is your fitted sheet and a flat surface. That's pretty much it, honestly. This process is truly about technique, not about needing special equipment, which is rather convenient.
Your Fitted Sheet
Grab the fitted sheet you're ready to tame. Make sure it's clean and dry, of course. A damp sheet is harder to fold smoothly, and it won't store as well either. Any size will work for this method, whether it's a twin, full, queen, or king. The principles remain the same, so you can apply this to all your bed linens, which is quite helpful.
A Flat Work Surface
You'll need a good, flat area to work on. A table is ideal, like a kitchen table or a dining table, because it gives you plenty of room to spread the sheet out. If you don't have a table big enough, a clean floor can work just as well. The main thing is to have a smooth, stable surface where you can lay the sheet completely flat without it bunching up, you know? This really helps with getting those crisp edges.
The Simple Steps to Fold a Fitted Sheet (A Foolproof Method)
Alright, it's time to face your folding fears, as "My text" puts it. This step-by-step method helped me fold fitted sheets without the chaos, and I'll show you how to fold a fitted sheet with step by step instructions. You'll have it mastered in no time! This video, "My text" says, shows each step, and each part of the process is explained, so you won't get lost as you might viewing other videos about it. So, let's get started, shall we?
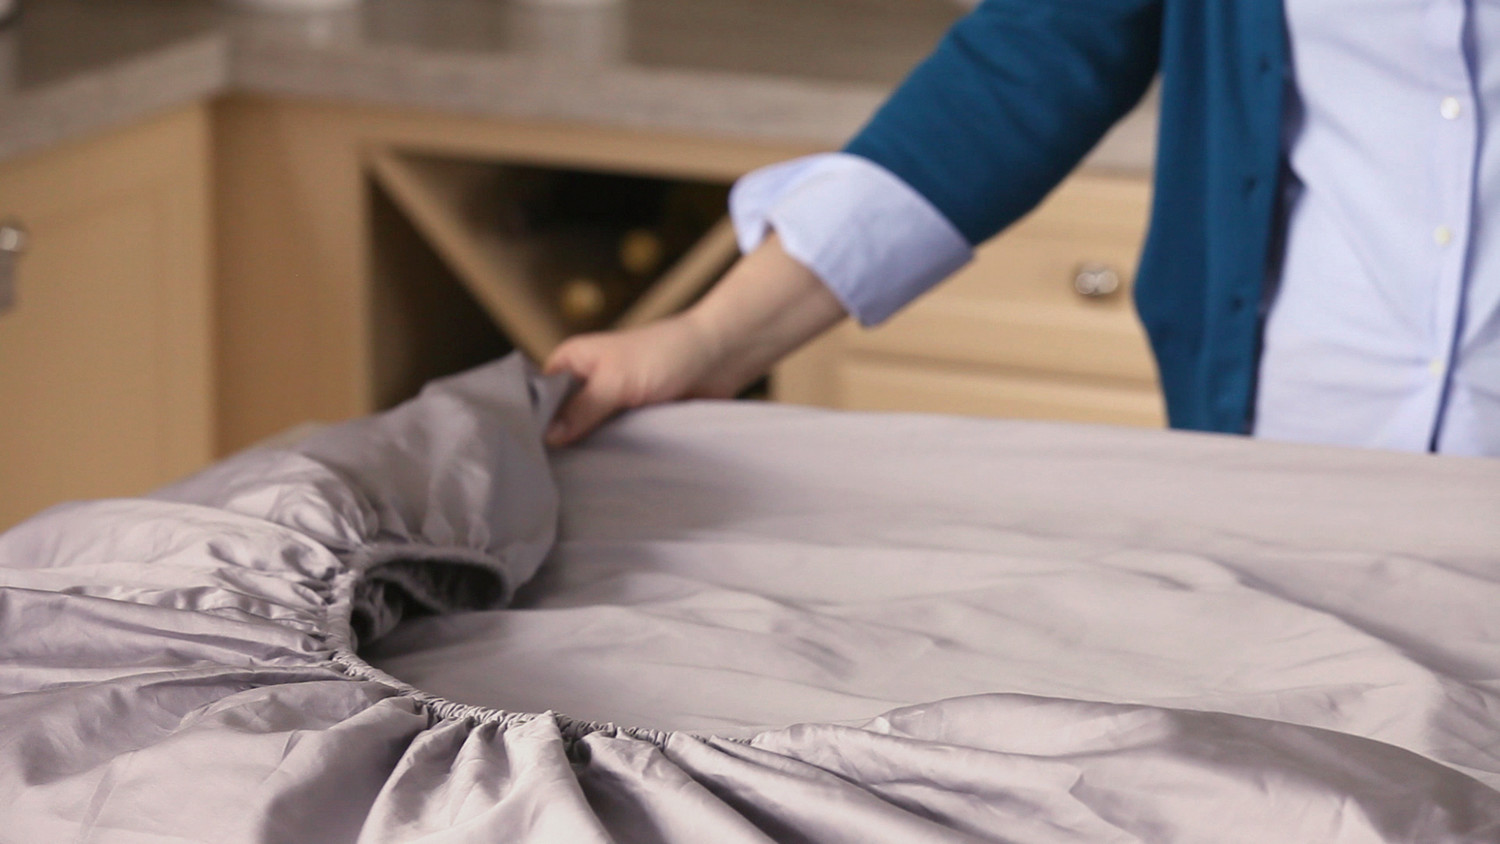
Step 1: Laying it Out Just Right
The very first thing you want to do is lay your fitted sheet out flat. "My text" suggests starting by laying it flat with the elastic corners facing up. So, spread it out on your table or floor, making sure the side with the elastic edge is facing towards the ceiling. You want to smooth it out as much as you can at this point, getting rid of any major wrinkles or bunched-up areas. This initial smoothing really helps set the stage for a tidy fold, and it's pretty important, actually.
Take a moment to truly spread it out. You're looking for a relatively flat surface of fabric, even with the elastic. This might mean gently pulling on the edges a bit to stretch it out. It's almost like you're trying to iron it with your hands, just without the heat, you know? Getting this step right makes all the subsequent steps much easier to manage, so don't rush it. This is your foundation for a neat fold, after all.
Step 2: Bringing the Corners Together
Now, this is where the "trick" comes in, as "My text" explains. You'll want to find two adjacent corners of the sheet. Typically, people start with the two corners on one of the shorter sides, or perhaps two corners on the same long side. What you do is fold these two corners together, tucking one inside of the other. It's like you're putting one corner's "pocket" into the other's "pocket," creating a double-layered corner that holds its shape a bit better. This is a pretty clever move, honestly.
Once you've got those two corners nested, you'll then take this combined corner and bring it over to the third corner. Then, you'll tuck that third corner into the newly formed pocket as well. So, you're essentially stacking three corners together, one inside the other. This creates a really solid, neat corner bundle that's much easier to handle than a floppy single corner. It's a bit like building a little fabric fort with the corners, which is kind of fun, in a way.
After that, you'll repeat the process with the fourth and final corner. Bring it over to join the other three, tucking it snugly inside the bundle. When you're done with this step, you should have all four elasticized corners neatly tucked into one another, forming one substantial, well-defined corner. This is a crucial part of the process for getting those sharp lines later on, and it really makes a difference to the final look, you know?
Step 3: Folding Lengthwise
With all your corners now neatly nested, you'll have a more manageable shape. Now, "My text" advises to fold the sheet in half lengthwise. So, take one long side of the sheet and bring it over to meet the other long side. This will create a long, somewhat rectangular strip of fabric. Make sure to smooth it out as you fold, trying to keep those edges as straight as possible.
This fold might still feel a bit bulky because of the elastic and the nested corners, but that's perfectly normal. Just do your best to align the edges. If your sheet is very large, you might even fold it in half lengthwise again, making it a quarter of its original width. The goal here is to create a long, relatively narrow strip that's easier to handle for the next steps. It's all about making it more compact, you see.
As you're doing this, pay attention to the newly formed straight edges. Run your hand along them to press out any air or small wrinkles. This attention to detail now will pay off in a much neater final package. It's a bit like preparing a gift, in a way, making sure everything is just so before the final wrapping. This step truly helps define the shape you're working with, which is quite important.
Step 4: Nestling the Remaining Corners
Now that you have your long, folded strip, you'll notice that the bundled corners are at one end. "My text" mentions to invert the corners of the top half of the sheet and nestle into the bottom layer corners, then bring the lower layer corners. This means you're going to take the top layer of the sheet and fold it down so that its corners (which are now part of the bundled group) align with the bottom layer's corners. You're essentially creating a more compact, layered rectangle. It's a bit like folding a shirt, actually, where you bring the top part down to meet the bottom.
This action helps to really consolidate all the elastic edges into one clean line. You're essentially creating a straight, non-elastic edge on one side of your folded sheet, and the neatly bundled elastic corners on the other. This is a key step in transforming the sheet from a floppy mess into a structured rectangle. It's pretty satisfying when you get this part right, honestly, as it starts to look like a proper folded item.
Smooth out the sheet as you complete this fold. Make sure there are no large bumps or air pockets. The more precise you are here, the crisper your final fold will be. You're basically turning your long, somewhat uneven strip into a more uniform, rectangular shape, which is much easier to work with. This is where the sheet truly starts to take on its neat, tidy form, and that's a good feeling, you know?
Step 5: The Final Fold for a Neat Package
You should now have a relatively neat rectangle with one side having the neatly bundled elastic corners and the other side being a straight, folded edge. From here, it's just a matter of folding it down to your desired size for storage. You can fold it in thirds, or in half and then in half again, depending on how big you want the final package to be. The goal is to create that "perfectly flat sheet that looks neat and tidy in your closet," as "My text" describes.
For instance, you might fold the bottom third up towards the middle, then fold the top third down over that. Or, you could simply fold it in half, and then in half again. The key is to keep the lines straight and the folds crisp. Press down firmly with your hands after each fold to remove air and create sharp creases. This helps the sheet hold its shape and prevents it from unraveling in your linen cupboard.
When you're finished, you'll have a compact, rectangular bundle that looks just like a flat sheet or a pillowcase. This clever technique, as "My text" points out, allows you to store neat and crisp sheets, which helps maintain them. It's a pretty satisfying sight, honestly, seeing that once-tricky fitted sheet transformed into something so manageable. You've basically mastered the art of it, and that's something to feel good about, you know?
Tips for a Super Tidy Result
Getting a perfect fold every time might take a little bit of practice, but there are some small things you can do to make it easier and ensure a better outcome. These aren't complicated tricks, just little adjustments that can make a big difference to your finished product, and that's pretty useful, honestly.
Smoothing as You Go
As you move through each step, take a moment to smooth out the fabric. Run your hands over the sheet after each fold to press out air and wrinkles. This isn't just about making it look nice; it helps the sheet lie flatter and makes the next fold easier to manage. It's a bit like patting down dough, ensuring a smooth surface. This small habit, honestly, improves the crispness of your final package quite a bit.
Consistency is Key
Try to be consistent with your folds each time. If you always start with the same two corners and follow the steps in the same order, you'll build muscle memory. This consistency means you'll get a similar, neat result every time, making your linen closet look more uniform. It's like learning to tie your shoes; once you have the rhythm down, it becomes second nature, and that's pretty convenient, you know?
Practice Makes it Easier
Don't get discouraged if your first few attempts aren't perfect. Like any new skill, folding a fitted sheet takes a little practice. The more you do it, the quicker and more precise you'll become. You'll find your own rhythm, and soon, you'll be able to fold a fitted sheet in minutes, as "My text" suggests, maybe even in under 60 seconds! It really does get easier with repetition, and that's a good thing, isn't it?
Beyond Folding: Storing Your Linens Well
Once you've mastered how to fold a fitted sheet, the next step is to store your linens in a way that keeps them neat and easy to find. This is where your newly folded sheets really shine, helping to keep your entire linen area organized. It's about creating a system that works for you, and that's pretty important for a tidy home, you know?
Stacking for Success
With your fitted sheets now folded into neat rectangles, you can stack them vertically or horizontally in your linen cupboard. Stacking them vertically, like files in a cabinet, can sometimes make it easier to see what you have and pull out one sheet without disturbing the others. If you prefer horizontal stacks, just make sure they're not too high, so they don't topple over. A tidy stack, honestly, makes such a difference when you're looking for a fresh set of sheets.
Using Bins or Dividers
To keep your folded sheets from getting messy, consider using storage bins or shelf dividers. You can place a full set of sheets (fitted, flat, and pillowcases) inside one of your neatly folded fitted sheets, creating a complete package. Then, place these packages into bins or use dividers to separate different sizes or types of sheets. This helps maintain order and prevents everything from turning into a jumbled heap, which is pretty useful, honestly. It's a great way to keep everything contained and looking good, you know?
For more great tips on keeping your home organized, you can learn more about home organization strategies on our site. We have lots of ideas for every room!
Common Questions About Folding Fitted Sheets
People often have similar questions when they're learning this skill. Here are some common ones that might be on your mind too, and we'll try to give some straightforward answers to them, you know?
How do you fold a fitted sheet by yourself?
Folding a fitted sheet by yourself is totally possible, and it's actually what this method is designed for. You just need a flat surface, like a table or the floor, to spread the sheet out. The steps outlined above, especially starting by laying it flat and tucking the corners, are perfect for a solo folding session. It's all about using the surface to help you manage the fabric, which is pretty clever, honestly.
What is the easiest way to fold a fitted sheet?
Many people find the method of nesting the corners (tucking one elastic corner into another, then adding the rest) to be the easiest and most foolproof way. This technique transforms the awkward elastic edge into a straight line, making the rest of the folding process just like folding a flat sheet. It really simplifies the whole thing, and that's a good thing, isn't it?
How do you fold a fitted sheet so it doesn't wrinkle?
To help a fitted sheet stay wrinkle-free after folding, the key is to smooth it out thoroughly at each step. As you fold, run your hands along the fabric to press out air and creases. Storing it flat and not cramming it into a tight space also helps prevent new wrinkles from forming. A neat fold and proper storage will keep your sheets looking crisp, which is rather nice, you see. For more tips on keeping your laundry fresh and wrinkle-free, you might want to check out this article on how to care for your sheets.
So, there you have it! The secrets to mastering how to fold a fitted sheet, turning a once-frustrating chore into a simple, satisfying task. This step-by-step method, as "My text" confirms, helped me fold fitted sheets without the chaos, and it can definitely help you too. You'll be able to store your linens in a neat and tidy folded package, making your linen cupboard a place of calm, not chaos. Give it a try; you might be surprised at how quickly you pick it up! And, you know, for more clever home hacks and organization tips, link to this page here.
- Unveiling Sabrina Carpenters Measurements Insights And Discoveries
- Unveiling The Secrets Of Sb19 Before Surgery Discoveries And Insights That Will Transform Your Surgical Journey
- Uncover The Secrets Of Skip The Game Odessa A Journey Of Discovery
- Unveiling Julianne Phillips Beyond The Spotlight Of The Wife Of Bruce
- Restaurante Colombiano Cerca De Mi

Folding fitted sheets, How to fold sheets, Fitted sheet

How to Fold a Fitted Sheet: 12 Steps (with Pictures) - wikiHow
Video: The Proper Way to Fold a Fitted Sheet | Martha Stewart
